Monday, January 20, 2014

Bye-bye, boogers

These pics are just blurry samplings as I start to go after the booger welds on the large patch pieces I added in months ago.  Recall that the rear wheel wells needed full panels replaced, but I didn't know how to weld well (and I'm barely passing now), so the boogers were prolific and ugly.  I'm trying to get them under control, but not necessarily pretty.
I'll have more to do later.  I'll probably use a cut-off wheel to straighten out some of the rough edges of the panels.  Who knows.

Sunday, January 19, 2014

Yet more work on the underbelly

These two holes are beneath the driver's seat, and I'm pretty sure they have something to do with the gas tank that I will no longer be housing there, so I'm going to plug them.
Just a wee bit of scaly corrosion here.  Once the tub is on the chassis, I'll be sanding this down to clean metal, which I'm hoping is under there somewhere.
I cut a patch out of 18 gauge steel, taking the time to get it to fit well.
A few tack welds to hold it in place so that I can pull the magnets.  (I've left them on a little too long a few times, which melted the metal in the magnet just a bit.)
Welded in and ground smooth to find the pinholes.
The backside.  Not awful welds.
More welds on the front to seal it up tight.  Also, I've cut a new patch for the smaller hole.
Here's the mini-patch from the underside.
The smaller patch welded in.  It has better welds that the bigger one.

Friday, January 10, 2014

More of the underbelly

This round was mostly an effort to clean off the grime and then treat any rust with POR-15.  Not to complicated or time-consuming.

First, I ground down some of my old booger welds from previous patch work.
And then I went after the rest of the belly with a wire cup on the grinder.

This area had an issue that I hadn't noticed before.  There was a bit of burn-through where I'd welded the rectangular tubing  down in place of a rotted hat channel.  So I ground it smooth for a patch piece.
The patch piece was just some flat stock bent in a vice.  Then, like I've done before, I burned it in a bit and then hammered it to fit the contours of the area.
If I do say so myself, my booger welds are improving.  I'm getting better at drawing little circles with the torch tip and moving the puddle at a consistent pace to keep the "bacon sizzle" sound going.
Ground smooth.

Another small patch in the passenger's floor.  On the right in this pic you can see the underside of the passenger step.

Shiny.
POR-15 time.  Note that some areas are already starting to blacken.  A good sign since I can't get all the rust given the tools and the patience with which I am saddled.
Lots of surface rust in need of conversion.  This is part of the firewall and where the fender mounts.  There's a crack along one of the seams that'll need my attention next week.
Just about done.  I won't get all the rust off the belly or from the hat channels, but I'll get enough to keep the rig from being structurally compromised, which is all that really matters.
This is the underside of the transmission tunnel.  It's knackered in some spots, but I'm not sure what modifications it will need until I get it back over and on the chassis.  So the rust treatment is just for now.

Tuesday, January 7, 2014

Patched a few holes in the driver's floor

As I was working on the driver's underside, I noticed a few spots of rust-through on one of the hat channels.  Now was the day to get them patched.  You can see them below.  I whacked the channel area around the two holes on the right to get a sense of how far the rot extended.  As you can see by the dents, they don't go really anywhere, which is good.  The channel itself is still structurally sound.
These three holes seem to have been intentional, especially when one considers the roundness of the upper left one.  But the other two are torn and/or rotted, so I'm covering them all.  I think there might have been a fuel relay between the two underseat fuel tanks that I removed in my initial teardown.   What it was, it ain't going back there, so the holes need to go bye-bye.
The hat channel cleaned of paint, primer, and POR-15.  Ready for welding.
Same for the three holes and two others that I just don't like.
I moved a little faster than the camera on this patch.  Just cut a rectangle, welded it over the seam for added strength, and charged onward.
Realized I should take a few more "in-process" pics, so here's a patch tacked down on one side.  I like to weld one edge of a small patch piece to get the entire piece heated up a bit.  Makes it easier to hammer it to fit the contours of the chunk I'm welding it to.
 Same over here.  You can even see the little dimples from where I tapped the piece a few times.
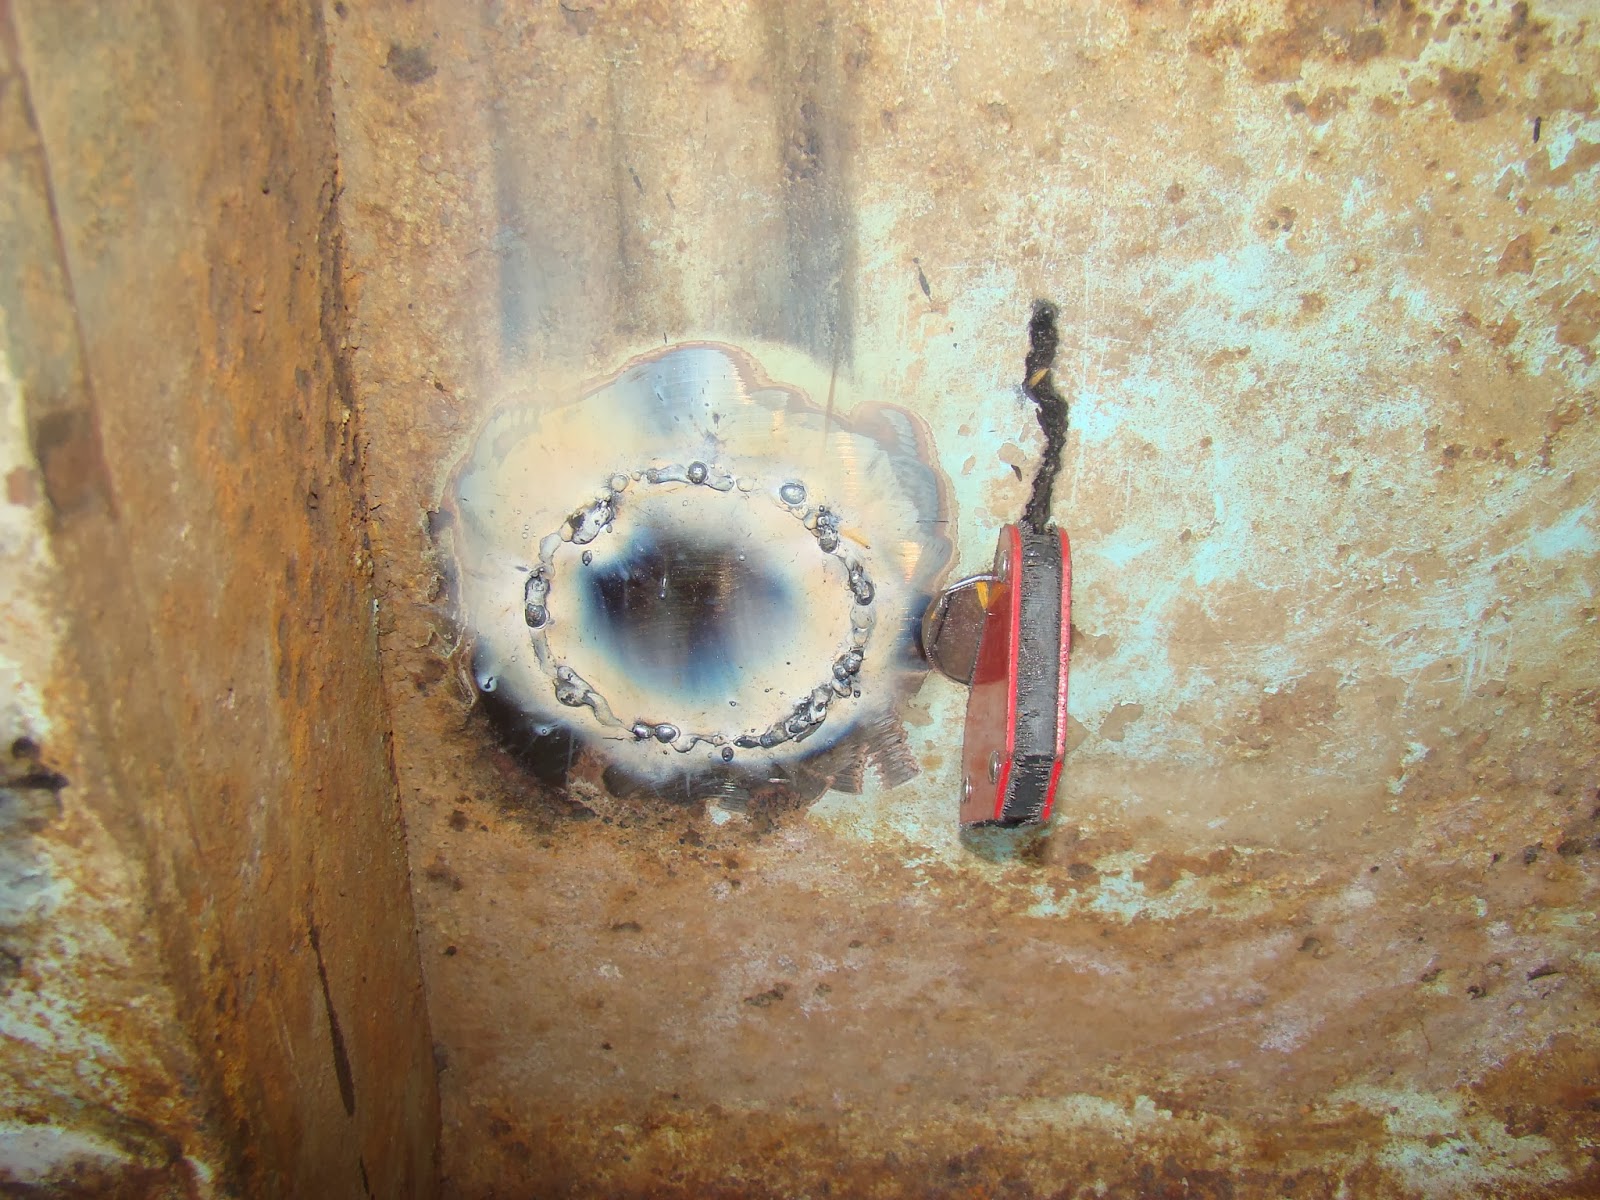
All welded up.  The two holes in the upper right area were welded over my copper pipe "spoon."
Closeups.
Rather than waiting a few days, I decided to hop right into the grinding and dressing of the repairs.
More closeups.
Primed.
Like a tormented turtle, this thing is stuck on its back for a little while longer.  I'm ready to get the tub Herculined, flipped over, and mounted on the chassis.  This work has been and still is fun, but I want to see if the engine runs and my tranny/transfer case rebuilds work and the seats fit and the lights shine and ...