Saturday, March 22, 2014

Grill and tailgate work

These four holes in the tailgate are likely for a spare mounting bracket.  I'm not going to do that (I'll probably mount mine on the full roll cage that I'll have built later).  Unfortunately, two of the holes are on the W and the S stamped into the tailgate, which bother me.  I wanted to do my best to make those blemishes nonexistent.
I started with the back, which I'm less concerned with.
The holes were large enough to warrant small patches.
The initial welds were, as usual, ugly.

Once the weather turned nice, I went outside to work on the grill and radiator mount.  Here's what I started with.
The stock replacement for a Ford V8 radiator doesn't fit the opening and will be too close to the fan itself.  But I'm going to use this radiator because it has the capacity to cool the 260.
To start the modification, I blew apart the spot welds.
My initial plan was to use the flanges, folding them away from the radiator to allow the radiator to bolt to it.
I made the amateur mistake of filling in my welds before knowing if it was going to work.


This was a hole that needed to be filled.  I just used my cooper "spoon" and welded up against it.


In the end, most of this work was a waste of time.  Live and learn.

Friday, March 21, 2014

More inner window frame work

These don't really look like tools to fix a metal window frame on a 1951 Willys Jeep CJ3A, but they are.  That polyester/plastic string and resin are going to help me restore a completely shot frame that is rotting away.
Here's my genius/stupid plan.  I got the idea from my previous experience of building a radiator fan shroud out of a T-shirt, resin, and some fiberglass cloth.

The slot is rotted out--I've established that. So what I'm proposing to do is fill the slot with the string, and then pour  in the resin, which will soak into the string before it hardens (providing a little connectedness, like rebar in concrete).
A bit blurry, of course, but I'm using a cap from a Liquid Wrench bottle and a screw to stir up little batches.
 Filled.
This is the top rail.  The main issue here is the center section, which I want to reinforce.
Once I got the resin in place, I started shoving in more string for reinforcement.
Both pieces ready to set up.

Sunday, March 16, 2014

Fenders coated

Back to the bedliner, though this time I used a knackered, ugly brush.
One last little repair so that the mounting flange is secure.
Scrubbed clean and wiped with acetone to get the dust and grime off.
Due to the messy nature of the bedliner, I skipped photos of the "during" stage.  Here they are all done.

Now that the rust treatment of the main window frame has dried and hardened, I was able to weld the holes up.

Saturday, March 15, 2014

Passenger side fender

Here's the driver's side fender scrubbed clean (nearly).  I had planned on doing the same for the passenger's side fender and then maybe slop on some Herculiner, but that was not to be today.
The passenger side.  Doesn't seem so bad, does it?  Time to dig a little deeper.
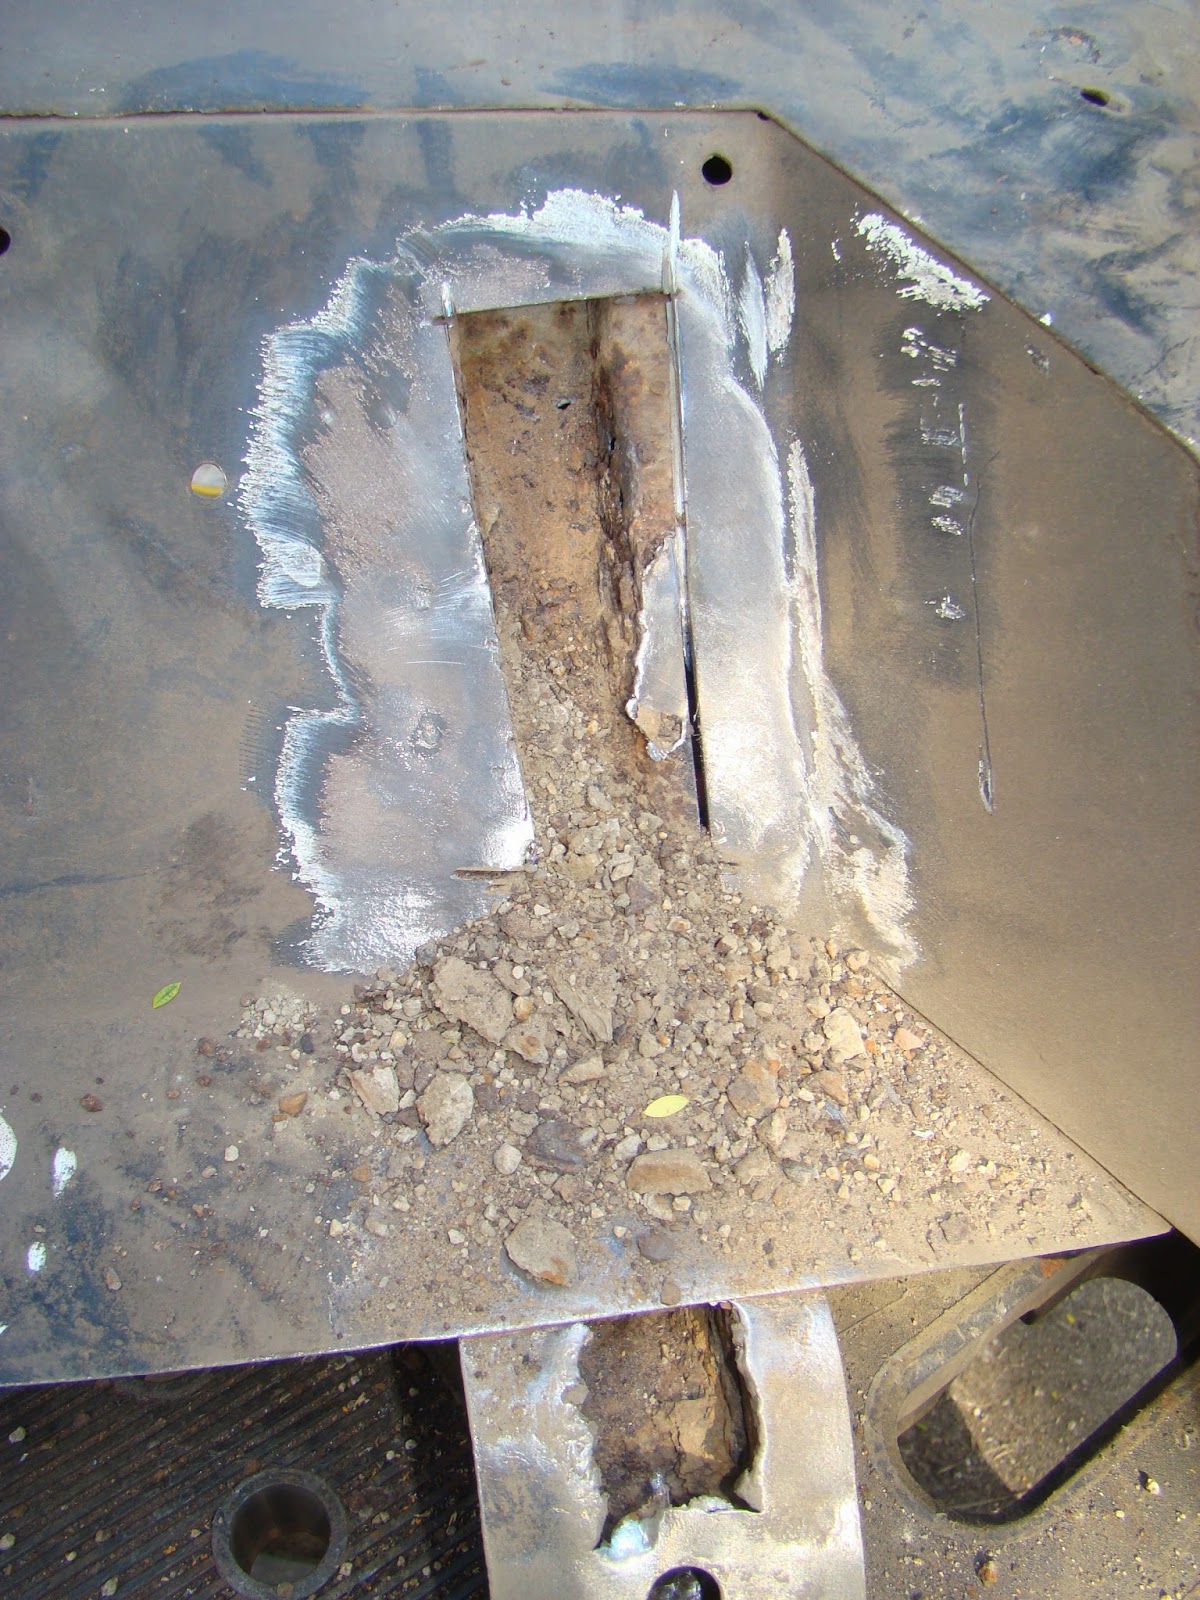
Here's the back side of the hat channel. This is where the fender bolts to the chassis frame rail.  That rot has to go away.
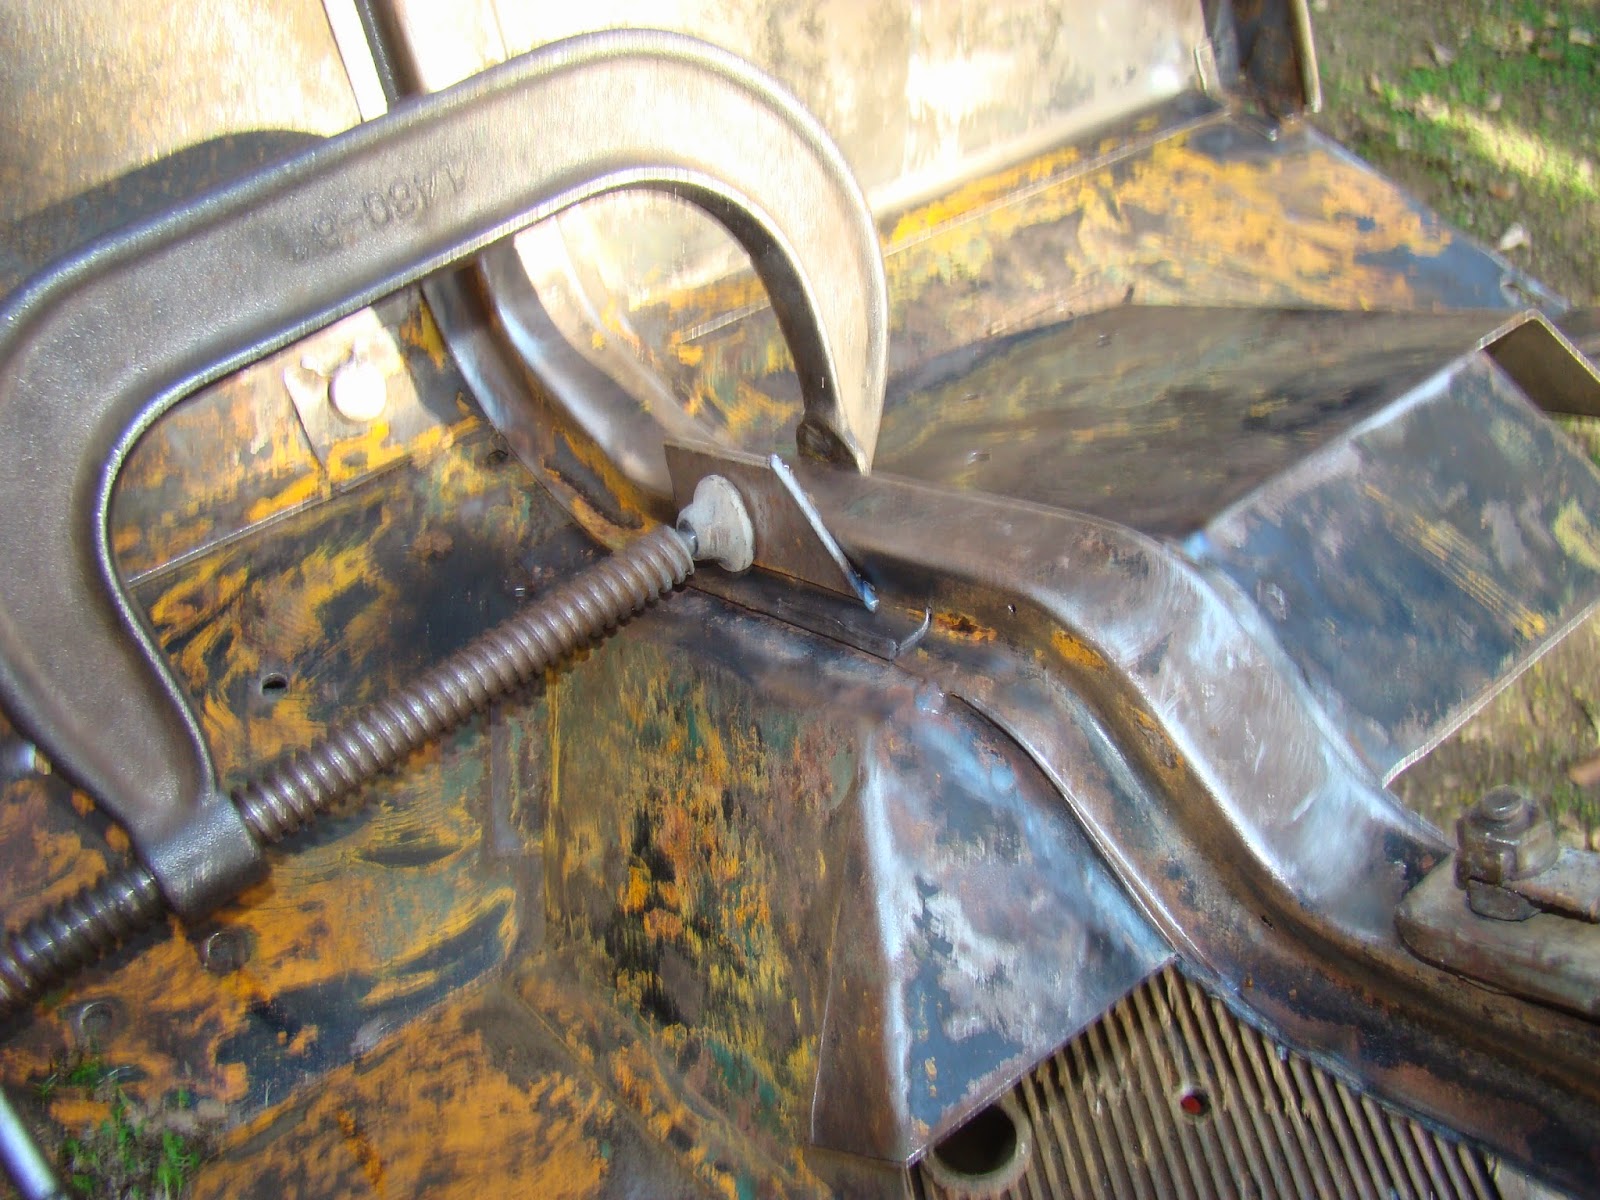
This is top mounting point where the fender meets the grill.  That crack wasn't terribly noticeable until I started scrubbing.
This looks like some nice, healthy, sixty-three year old oak.  But it isn't.
After the initial pass with the wire cup on the grinder.
Below is a classic example of a panel section that was held together with paint.  There was just a little flaking paint here, and then I started to go after it with the grinder.  The more I went at it, the more I found.
Not wasting time, I dove in with the cutoff wheel.
What's left of the rotted oak insert.
Avalanche!
To keep the repair simple and solid, I went with a single patch panel from the bottom of the hat channel straight up the side of the inside of the fender.

Ground smooth.
The hat channels, as per usual, continue to hoard the rot.   Here are a few holes in need of attention.
The first patch piece of scrap metal.
Lots of little patch pieces needed to repair this section.

Friday, March 14, 2014

Driver's side fender repair

One final panel to seal up the battery box from the outer elements.

Here is that rotted out hat channel area.  It's actually better than what I expected.  Just the outer sheet metal needs replace.  I ground it clean and cut a small patch panel (at right in the pic) to weld in there.
Welded in. 
To tie all these disparate pieces together, I made this little patch piece out of a chunk of cutoff.  I drilled some holes for plug welds.
A little too much heat.  The fender's hat channel just sunk right into the plastic of the fold out work bench.
Welds complete.
Ground smooth.
I also wanted to make sure I tied the hat channel into the bottom of the battery box as best I could.  These little L brackets are going to do the job nicely.