Today began with a simple task, get the belly scrubbed clean and apply rust treatment. There are no significant rust issues anymore, not since I'd repaired the passenger side hat channels, but there was surface rust aplenty and some grime and scaling. First, I flipped it belly side up. The swing set and rubber mats have proved quite useful in this project. My youngest really wants her swings back, but it'll be probably another three weeks before she does.
As per usual, I started with the grinder and the wire cup attachment. Welder's gloves, goggles, and a respirator mask keep me safe. This is a good shot of how much crud is covering the belly.
Here's the driver's side floor. No rust worth going after, except maybe that small hole where the long dog-leg channel meets up with the small channel that extends out in front of the firewall (the green one in the pic below). I'll deal with that soon enough.This is the driver's wheel well. Lots of tiny drill holes and some surface rust. All to be dealt with as needed.
This shot gives you a good sense of the before and after. I'm not getting it all down to absolute bare metal, but I'm quite confident I'm getting enough of the crud off so that the POR-15 will do its work and give me a healthy underbelly for the Herculiner to come.
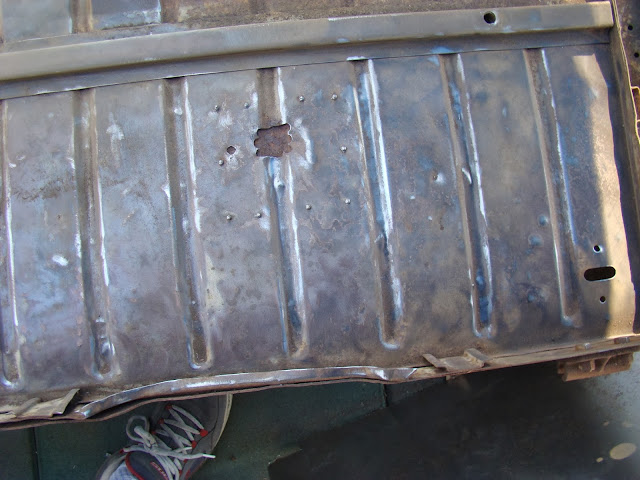
A close up of the cleaned area. That odd hole in the middle of the panel has been patched from above. It's good enough, so I'm not going to mess with it. Besides, I may end up cutting a hole there to have access to the fuel tank's sending unit. I won't know, however, until after installation of the tub on the chassis.
Another close up showing before and after.
Blurry but clean.
Ground smooth and scale/crud free.
After going over the entire belly with the shopvac to remove the dust and rust particulates, I poured on the Permatex rust treatment (again, essentially POR-15 which reacts with the rust to turn black and function as a primer coat).
Already starting to blacken.
On to the driver's floor pan. I applied most of this with a small glue brush. Not the most efficient tool for the job, but I have twenty of them, they're disposable, and they help me get in all the tiny crevices where rust may rest. Time to let it all "cook" for a while. I'll come back in a few days, take care of the small hat channel hole with a simple patch, and then move on to the transmission tunnel and whatever else the firewall needs.


No comments:
Post a Comment