This removal and rebuild is without exception the most complicated automotive task I've done. I've played around with suspension work, transfer case removal and installation, and some minor engine work on my big Jeep. Taking on the rebuilding of an old school transfer case and transmission will be a challenge. Now that I've pulled the overdrive unit, it was time to take out the Dana 18 and the T90. It started with removal of the oil pan
and the parking brake arm.
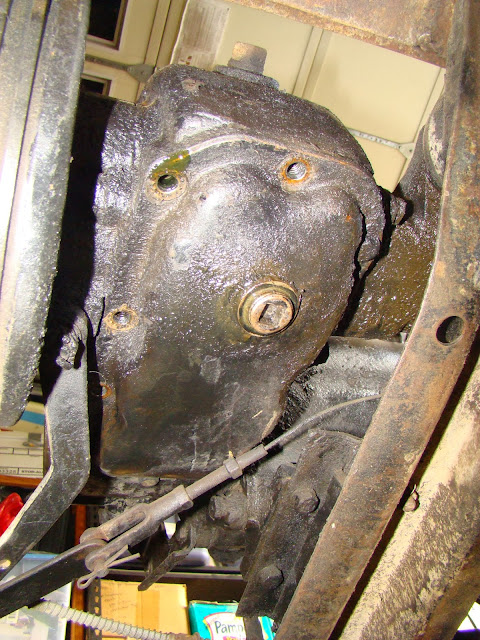
More hideous sludge.There's clearly an oil leak, likely where the tranny meets the transfer case. Oil EVERYWHERE.
To lock the transfer case, I read in Rick Stivers' how-to that first/reverse gear should be slid all the way forward
and the shift collar slide towards the front of the case. This would supposedly lock the transfer case so that the output yokes wouldn't spin.
But that's only if you have a normal input shaft gear here, which I don't since I'd removed the overdrive.
My air impact gun got the rear yoke nut off.
But to hold it in place, I put some black pipe through the axle u-joint straps on the front yoke. That made it easy.
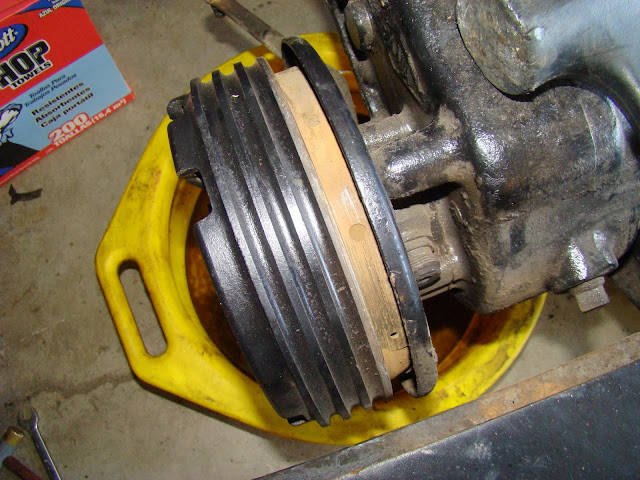
Then I worked the parking brake drum off. I'll be putting in new shoes, at minimum, but maybe some new springs/hardware as well.
Inside, I found a little surprise, this clump of mud. In the pic below, I've moved it, but you can see where it sat at 12 o'clock.
It's a mud dauber nest. Reading through some online Willys tech articles, I learned that this is a common occurrence inside of transfer cases (not the brake drum) as they can crawl in through the breather hole. They're common in rural areas, and since this was a farm rig in central California, the nest's presence isn't unusual.
So my secret weapon to loosen some of the grease and grime on the bolts to get better bite with a socket is ArmorAll tire foam. I'll be using it a bit on this job.
On to the front yoke. First I sprayed it and let it sit while I went after the shifter levers.
The linchpin is next. Go easy on pulling it to avoid scarring.
Off they come.
Once the nut was off, again with the air gun, I used a pickle fork to pry the yoke off.
The transition crossmember mount is next. I initially pulled the bolts to remove the front bearing cap from the rest of the transfer case housing, but that was not going to work (my limited understanding of the guts of these things showed here). More tire foam:
Here it is from underneath.

I removed the bolts that mount the transfer case to the back of the T90. Now it's just a matter of breaking the seal loose.
I held it by the front bearing cap and the hole made by the removal of the overdrive. (Thanks to my eight year old son for taking photos as I did this part.)Getting there.
Off.
And down. Note the designer footware. Not smart given the weight of the cast iron case, but I was careful not to lose a toe or two.
Now I needed to pop off the transmission. This is an old and inelegant transmission adapter, just a massive chunk of aluminum machined to mate the two together. The bolts into the bell housing are not in good shape, but none broke off, so I'm happy. When I put in new ones, I'm going to slap on some anti-seize to be on the safe side I think.
After removing the nuts hold the transmission crossmember mount in place, I started the wriggle/jiggle process to break seals and get the box to slide back.
And it's off. I'm getting excited by the challenge of the rebuild. I've read up quite a bit, as most bookworm intellectuals would do, so armed with that information and absolutely no experience, I'm itching to have at it.
Side note: one trick that I figured out was to jack up the engine, lifting the transmission clear of the crossmember. The engine just pivots on the two mounts. I'm glad I thought of this before I just yanked the transmission off; otherwise, I'd have watched the engine rock ninety degrees, dropping to the garage floor.
A hydraulic jack and a jack stand will keep things secure while the two tranny boxes are off the chassis.
I've ordered a new clutch and pressure plate kit since it'd be foolish not to replace them with the rig as stripped down as it is. This is where the hybrid nature of this project is going to be interesting. I've got to get a '63 Ford Fairlane clutch mechanism to work in a '51 Willys chassis.
I adjourned to the ping pong table up on the patio for bit more space and light, and to be near the kids as they hung out upstairs. I laid everything out and dug in. Note the little dowels and electrical conduit pipes. Those will be useful when I get around to rebuilding the box.
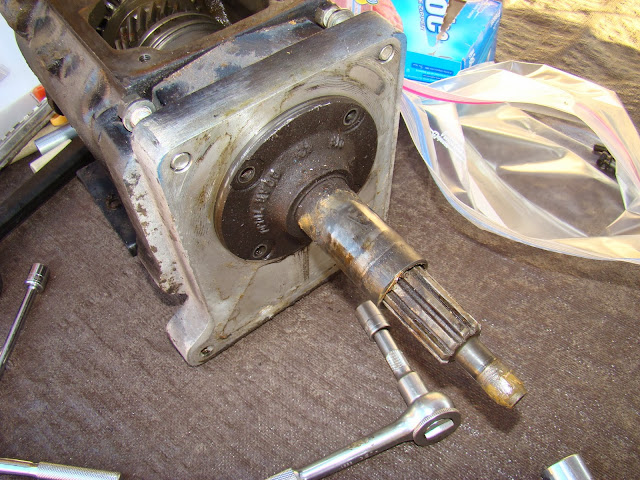
I had to remove the flange to get the adapter off.
Look at how corroded the top bolt is here. I'll have to figure out why and what to do about it.
Off it comes. There's a slight indent in the adapter to keep a tight fit. I'll have to get a seal for this.
The adapter is next. It's not a pretty adapter. I'll scrub off that paint and make it look a bit better at some point.
These little twelve-sided bolts were a bit of a bugaboo. I didn't have the right tool, so I had to take a trip to Home Depot to get one. I'd hoped for a socket, but that wasn't in stock. I went with a tiny wrench.
This is easily the most dead seal I've ever seen. It's rotted/dissolved while simultaneously not easy to remove. Fortunately, the two bolts here were allen head rather than the twelve-point heads they were supposed to be; that would've confounded my little wrench something fierce.
Out goes the main gear cluster.
And the secondary shaft, knocked out the back with a brass punch.
Then the main shaft slides out the front of the case.
Almost empty. Just a few parts to go.
Screwdrivers will get the job done better. I did a little prying, got a ring on one end of the snap ring to keep it from snapping back in place, and then worked it out. This is what it looked like when I was done. Since this was yanked, I've purchased a vintage set of snap ring pliers off of eBay for the rebuild.

If I was at all unsure if the tranny needed a rebuild, I got confirmation with this main bearing's condition. But getting this off is going to take an insane amount of time, power tools, and anger. Supposedly it's just to pop off with a gentle rap or two on a plank of wood. It didn't.
I bagged the rest of the parts as I pulled them to keep things organized and free of moisture.
This is what it looks like when all the parts come off like they should. Remember this picture when you see what happened to that stuck bearing.

This will be my nemesis.
Not proud of it, but I had to resort to a cutoff wheel. I was quite conscious of the possibility that I could ruin the shaft, and I'll admit that I did indeed nick it in my grinding. But it was a simple equation: if I couldn't get the bearing off (and a bearing puller wouldn't work given the length of the shaft), then this shaft would be junked for a clean replacement. So I didn't have much to lose. The cutoff wheel gave me a little more control than a thicker grinding wheel. First I cut through the outer bearing ring, removing it and the ball bearings. Then I went after the inner race:
This is what is left of the bearing. I'm sure there are a few ball bearings lose on the floor of my shop somewhere. I'll save them as backups for my kids' Mousetrap and Labyrinth games.
The base that helps the T90 attach to the crossmember was the last chunk to be removed.
Wiped clean. No cracks. I'm a happy guy.
Mating surfaces cleaned. I'll degrease the entire box at some point and give it a good paint job so that I'll be able to see any future oil leaks should they arise.


No comments:
Post a Comment