First I had to remove the starter. I got my son to get in there with what he likes to call the "clicky wrench." He would prove to a fun and useful companion through the tear down.
Given the cleanliness of the starter, it was obviously not installed when the previous owner gave the engine a dash of Old Ford Blue. Note in the pic below the paint on the flywheel and the flywheel shroud. The oil pan needs to be dropped, cleaned, and reshot. I think it was painted while still covered in grime.The bellhousing was next. Still more blue overspray. Once I popped the bolts loose, my son had at 'em.
The stamping code on the back of the engine. I'm collecting these while I have easy access to them.
Got it cracked loose.
And off.
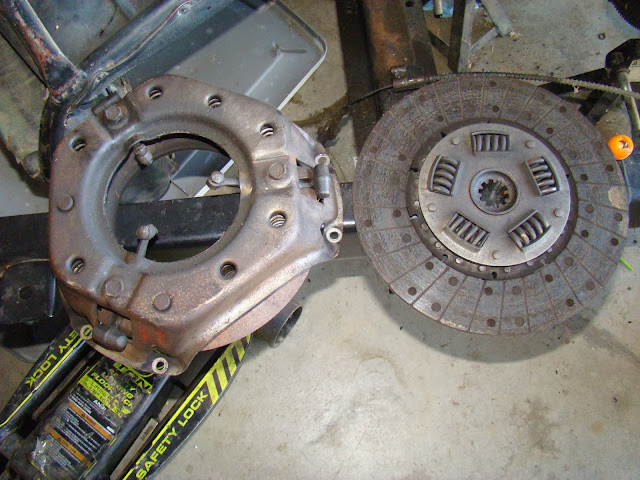
This is an old-style pressure plate with just three fingers applying the tension to the clutch disc.
Here you can see where the input shaft connects the V8 to the T90.
Six bolts and out. The disc on the right wasn't much thinner than its replacement, but this one is a bit glazed, and there was no earthly reason to keep it when I can pop a new one in, with a new/upgraded pressure plate, for a little over a hundred bucks.
Look how glazed over this thing is. This is the side of the pressure plate that rides up against the clutch disc.
Equally glazed, but I'm not replacing the flywheel. A good cleaning with acetone and a green scrub pad should get it in better shape.
The new clutch and pressure plate.
The flywheel cleaned up. Also, note the hole in the center of the flywheel. This is where a bushing or bearing goes for the tip of the T90's input shaft.
On the left is the bronze bushing that was in said hole. The bearing on the right is a bit thicker, sitting proud by about 1/16" or so. This is a nice upgrade that came with the Valeo clutch kit.
A closer look, with the roller/needle bearings more visible.

I hammered it in with a dead-blow hammer and a large socket.
Once the bearing was installed, the clutch-centering tool slots in it effectively so that the pressure plate can be aligned properly.
My son wrenching on the pressure plate, applying a few turns to each before moving on to the next so that it is cinched down evenly.


No comments:
Post a Comment