Saturday, September 28, 2013

My first attempt at welding

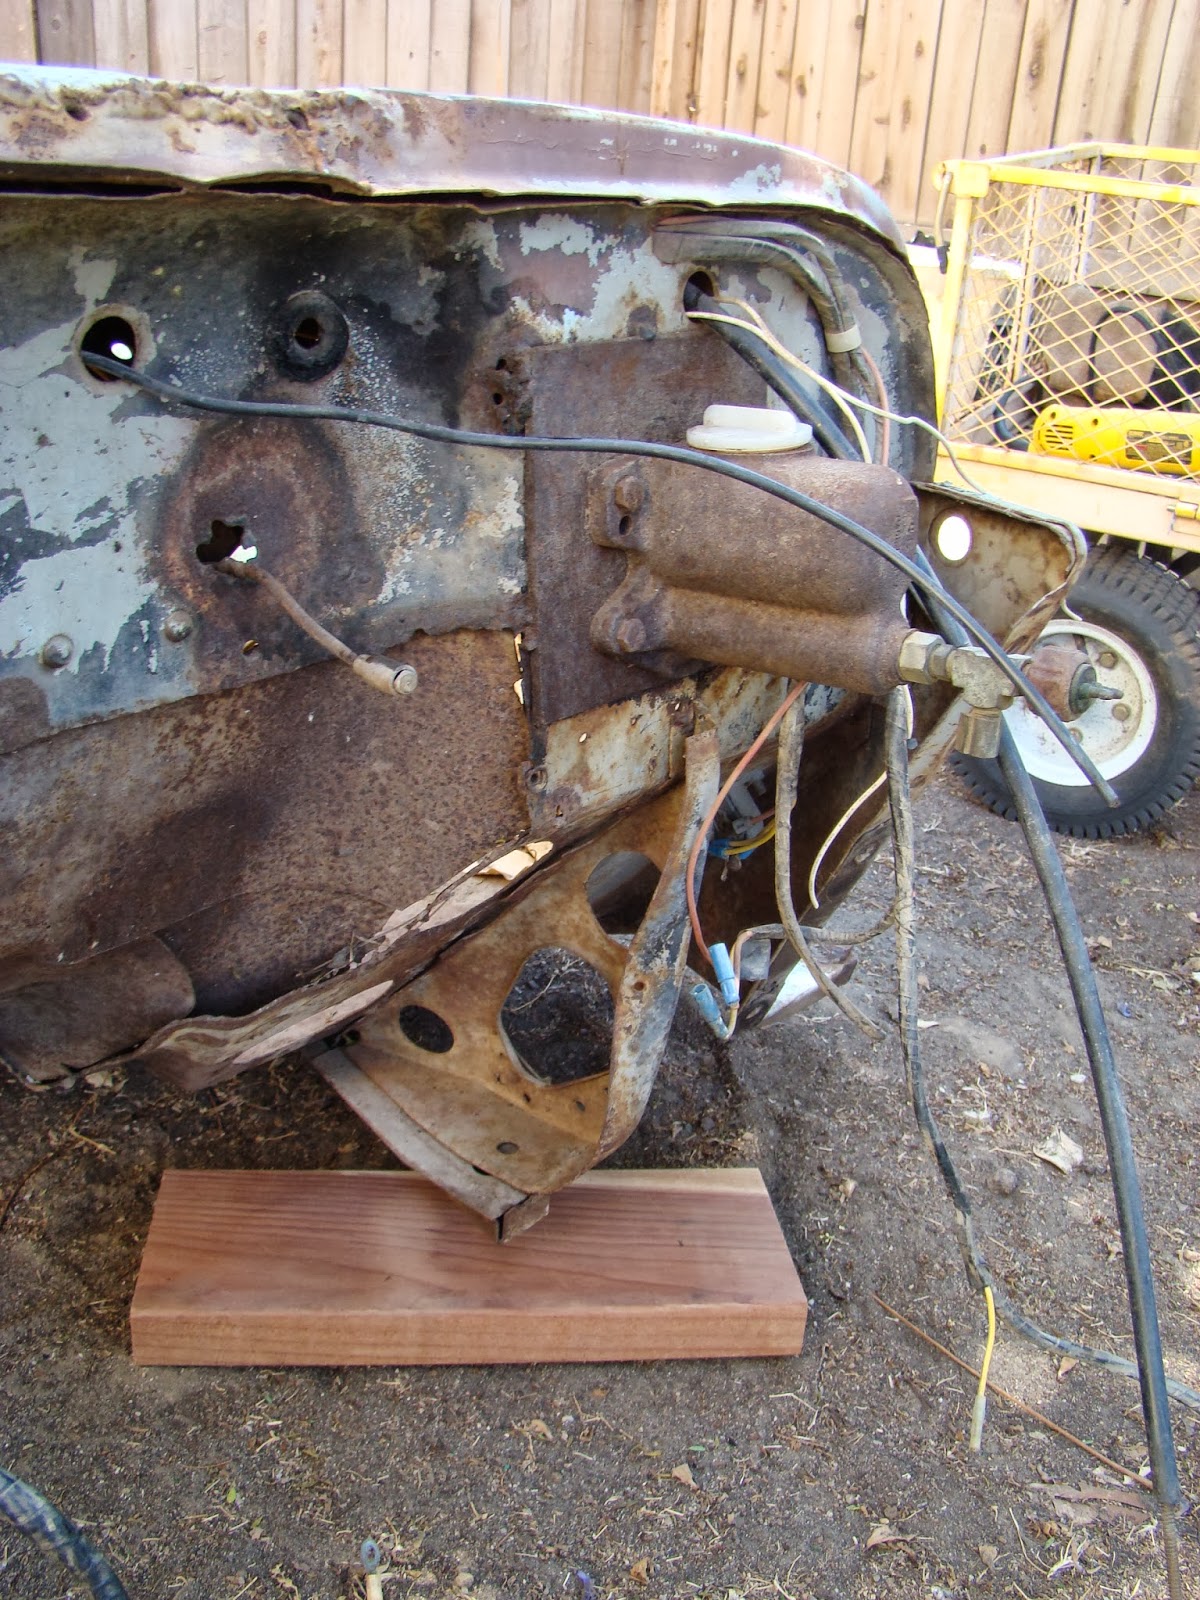
So as I said before, I'm keeping the 3A tub since it has the better floor and is significantly more sound (as well as connected to the title).  But here's where I had some work cut out for me.  These holes came with the tub, so I had to clean up the edges and make some templates.
I'm not sure which of these slots was for a radio of some kind, but I won't be installing one myself (or if I do, I'll mount it below and out of the way, perhaps under the driver's seat since the gas tank won't be there.
 With the 2A tub in two pieces in the backyard, I tapped around for a solid piece of sheet metal so that I could keep costs down and use the donor tub for just that.
 With a little tweaking on the grinding wheel, I was able to get a close fit.
Magnets hold it in place, flush with the surrounding panel.  I'm not expecting this to be a hidden repair, but I'm hoping when I put the old shift-sequence plate back on, it'll make it harder for the ignorant to know.
To weld it in place, I found a nifty little 110V Lincoln Pro-Mig 135 over in the San Fernando Valley for $300.  The seller used it to patch an Acura Integra sunroof, but he was upgrading to a Lincoln 180 (220V) to build some wrought iron accents for his home.  It was in the budget for a hardly used but good quality model.  It probably dates from the mid-2000s.

I went at it with gusto, learning as I went what worked and what did not.  I'm using .035 gasless, flux-cored wire since I'm welding outside in the backyard (breezes make it hard to use gas-shielded wire effectively).  Not to mention there's an "idiot-proof" quality to flux-cored wire that suits me.

Here are my booger welds.  Yes, that is a term I've learned, not made it up.  The welds, rather than looking like a fallen stack of dimes, resemble crusty/lumpy boogers.  I'm fine with that.  I'll be grinding nearly all my boogers down flush and then bondo-filling the gaps.  Should work out well.
In this panel, you can see how significant the surface corrosion is on the "good" sheet metal I'm taking from the 2A tub. It is only surface level, still plenty of integrity to the patch panel.
You can see in the upper right where I didn't quite get the patch panel to match.  So be it.  Another opportunity to refine my patch welding techniques.
I cut a sliver to put in that upper right area, held it in with the magnets again, and went nuts with the welding. I'm not very patient, so I don't move my welds around much or allow it time to cool, but for insert panels like this, it's not terribly important.
A grinding we will go.  Haven't ever done that before, either, so I'm hoping to keep my fingers, my eyes, and my patience.  So far so good.  Of course, I wear welding gloves and safety goggles over my glasses to keep shards from getting where I do not want them to go.
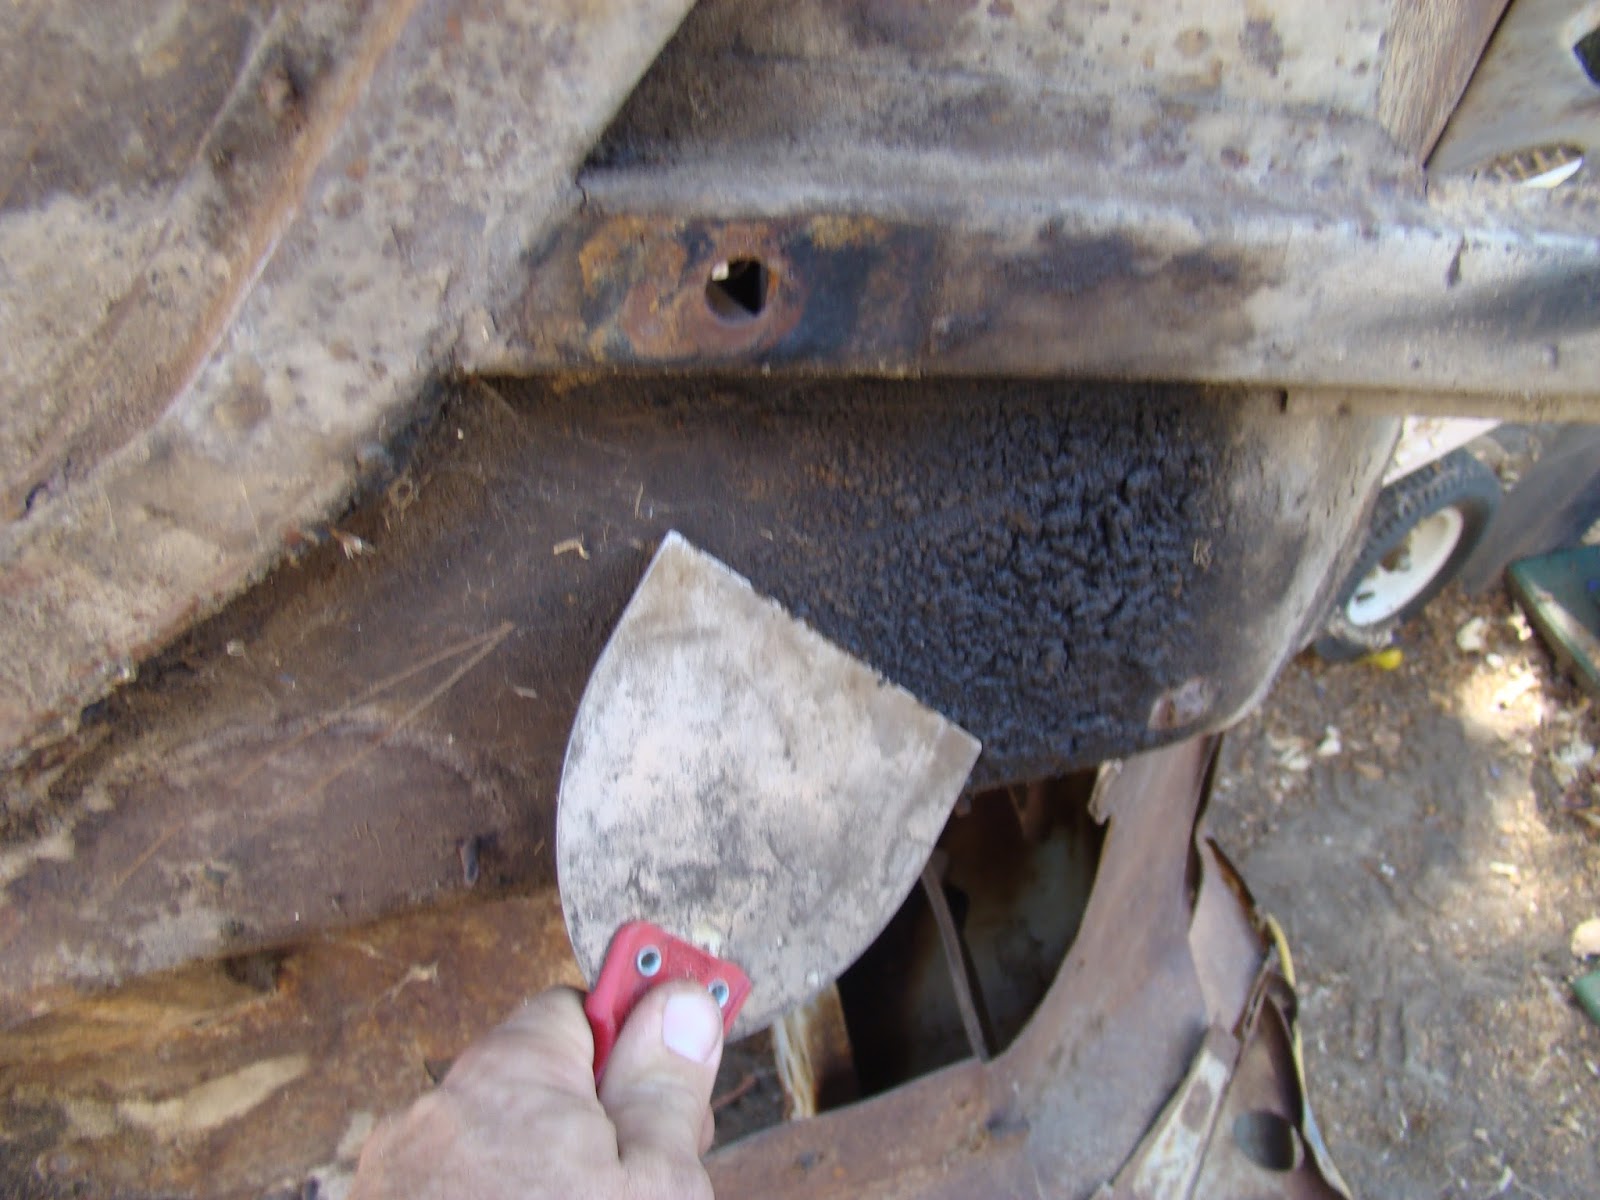
Getting there.  Some small gaps that I'll have to back and fill later.   Some are large, so I'll need to weld;  others are pits or pinholes, so bondo will do nicely.
I'll have to go back after those dime-sized holes later.  There are several of them in the tub, like it was shot at by Elvis pissed at his favorite t.v.

Friday, September 27, 2013

Dismantling the spare tub for parts

With having to work with two problematic tubs to create or merge them into one, I need to strip them down for whatever I can salvage.  Each has multiple gauges (but not all of them present and/or in working condition), plus yards are crusty wiring that I will be chucking.  Here are some dash pics of the keeper tub.
The firewall cluster.  I just hacked at all of this to get it gone.

The CJ2A is better and worse.  The thick black paint is no doubt hiding some issues, but that's not going to be my problem.  The steering column will need to be addressed, as well.  I'll refurbish it (most likely), but it's a little bent, so we'll see.  I'm hoping, as with most everything else, to avoid having to purchase any/many new parts.
I'm going to use the gauges from the 3A tub, assuming they work.  These here seem a bit too rusted out for me.
 The underbelly.  All this is in the trash now.
I'll also pulled the taillights, one of which was missing a lens.  They may be salvageable, but I do not enjoy old wiring.

The dash on the donor tub is in great shape, but transferring it to the 3A tub would be a pain in the butt.  I'll patch it instead.

After the wiring, I went to the pedals and brake system.  This master cylinder is a rusted wreck.  It has no reuse value, so it's going into the growing scrap pile.  With the Ford V8, I'll hopefully have the room and resources to put in a quality dual master cylinder, possibly with a vacuum booster.
The mounting plate is welded in place for reinforcement.  Not a bad idea, but I don't know what it might be hiding, so it has to go.  I'll put up a new plate later in the rebuild.  For now, the tear down continues with a cutoff wheel.
The exposed firewall.  Not terribly pretty.  I'll grind/brush it smooth, primer it, and then be ready for a new backing plate.
The 3A tub is missing the tool box that goes under the passenger seat.  A few clues suggest that it was removed so that a second gas tank could be placed there.  First, it's missing.  Second, there was a gas filler neck on the passenger side.  Third, the single vehicle came with two tanks.  At any rate, I want the tool box back.  It's a cool feature, and the 2A tub has a viable donor box.  The lid obviously comes off rather easily (hinges have given up on me), and you can get a peek at the hat channels and 60 year old oak in the 2A tub.
I went after the seams with an air chisel and spot-weld cutter.
Getting it loose.
Gone.  Note the bondo where the side panel meets up with the floor.  It's just in hideous shape.
I'll fix the toolbox, clean up its edges, and weld it into the 3A tub.  It'll also allow me to mount the passenger seat so that it folds forward the way it was designed to be.

Thursday, September 26, 2013

Wheeler dealer?

So I found a screaming deal on eBay for a T86 transmission and Dana 20 transfer case out of a 67 Kaiser Willys J-truck.  It was available for sale and pickup in San Bernardino, so I placed a max bid of $45, thinking I'd never get it.  When the auction ended, I was out a grand total of $23 and was able to pick it up after work.  The shop was maybe ten minutes from our old house in Cooley Ranch, so I knew the neighborhood and could get there quickly.
Here are some pics of the heavy chunks.  In loading it in the wife's minivan, I had to flip it over, not really thinking about the breather valve on the top (now the bottom) of the Dana 20.  Gear oil spilled a bit and cost me an old Spanish blanket and some time cleaning a small panel from the Odyssey.  Oh well.
I'm hoping to clean up the Dana 20 and sell it outright for about $100.  For the T86, I'll try to sell it whole, but will likely end up parting it out.  In the end, it will be very hard way for me to lose money on this deal, especially since I got a spare front drive shaft with the deal that will fit the Willys perfectly.  I'll just replace the U-joints (or find some usable end caps) before packing it up for a carry-along
spare.

Sunday, September 15, 2013

A few more sales

Sold the Wrangler slip yoke driveshaft on eBay for $15 plus shipping.

Sold the CJ5 rims this morning for a hundred bucks to a guy driving a bright orange Wrangler Unlimited rolling on at least 35s.  He was picking them up for a friend of his.

And a guy came by this afternoon and bought the shot red window frame.  I spent a bit of time cleaning it up for him and removing the Colorado state license plate, only to find out that he wanted the plate since his girlfriend is from there.  I just wanted him to see the Willys stamp underneath it.  I was curious what he was going to do with it, given its awful condition.  Turns out, he is a bit of an industrial artist (in his words, the inside of his house looks like a garage) and plans to replace the glass with mirrors and mount this thing up on the wall as bar art.  With a bit of grinding, he should end up with something cool.
I'm going to do some wall art thing myself with the turquoise grill that I decided to keep.


Friday, September 13, 2013

Tub restoration day 1 - hat channel assessment and removal

I flipped the tub up onto its driver's side to get a better angle to examine the belly and work on it.  To start, here are some wide shots showing what I inherited.  That black stuff is a rust preventer compound of mud, oil from various parts of the Willys drivetrain, and road grime.  As nasty as it is, it worked to keep the bulk of the underbelly from rotting.
A close up. Methinks I may have a leak from the transmission or transfer case.
And the rear pinion.
I spent some useful time with a scraper getting the gunk off.  I'll bring in the grinder later on, when I want to get even the thin layer of surface rust off, which I'm not ready to do yet.
When all was done, here's what uncovered.  Not bad at all.
You'll notice the passenger side hat channel is all but gone.  This is going to be the only significant structural work the underneath is going to need from me.
I began my assault by using an air chisel to get under the lip of the channel to expose where the spot welds themselves were.  Then I drilled out some of the spot welds and started pulling pieces off the belly.
When I was done, I used a large cutoff wheel to delimit where the hat channels would be excised.
Here you can see the rotted floor where the hat channel pocket was, as well as my first cutoff spot.
I'll be removing the bulk of the Y-joint, but the portion that runs up under the passenger side foot well will stay.  Here's the  end product of my efforts today.  I'm happy with what I've accomplished.
I'll replace them with 1"x2" rectangular steel tubing rather than repro hat channels.  Cheaper and strnger.  I'll weld them to the existing hat channels and the good floor.