Friday, November 7, 2014

Gasket R&R

I didn't do a good enough job getting the seal on correctly between the Dana 18 and the T-90.  But of course, I didn't learn this until I had the body on the chassis and no longer had easy access.  So I built this little cart to hold up the Dana 18 and allow it to slide backwards away from the transmission without dropping in elevation onto my chest and breaking multiple ribs.
Worked perfectly.  The key was solid steel castors and good balance.
 Overall, it worked.

Friday, September 12, 2014

Remote oil filter mounted, plus the dipstick tube

The oil filter won't fit between the frame rail and the Ford V8, so I bought a remote oil filter kit from Trans-Dapt.  I chose to put in in the notch where the original battery would squeeze in.  It's well out of the way of everything else in the bay.
 Note the steering column joint at the top of the photo below.  And just next to that is the frame rail.  No room for a filter canister.
Nice fat hoses to go from this filter mount to the filter plate on the engine.
Down under the engine.
Love my zip ties.


While I was at it, I went after the dipstick tube.  I had some scrap metal, which fit a nearby threaded rod coming out of the exhaust manifold.  I cleaned off the tube and butted it up against the scrap piece.
Notice the slight twist I put in the bracket.  I don't want any excess tension on the tube or the bracket.
A few quick tack welds.
Complete welds.
 Ground smooth and primed.
Classic black.

Monday, September 1, 2014

Exhaust system buttoned up

The exhaust routing is problematic for obvious reasons: a big Ford V8 in a little Willys CJ3A.

Here's one of the two pipes that came with the project.  Rusted quite extensively, but I tried to salvage them both.
The end is a bunch of overlapping bits, and I ended up trying to make even more layers as patchwork quilt of crappy metal and booger welds.
Even cleaned up, it's just a wrinkled and rusted mess.
A patch pipe.
I cut off the original flange with the hope that I could get a 2" pipe on there instead, which is a more standard size.
Man alive was I trying to chase good metal to get the new pipe mated to the old pipe.
But this is what I had to deal with.  Any heat at all burned through the thinned, rusted metal.
So then I tried a patch over that.  Ridiculous.
Since that wasn't working, I cut the other pipe off (no amount of liquid wrench, heat, and torque could do the job).
Notice the difference.  The bottom one, off which I cut the rusted pipe, has had the flange cut off and rewelded.  I'm going with the stock Mustang driver's side manifold (which, again, came with my project).
As much as I wanted these to work, they just had too much rust to be viable.  So I cut the flanges off and went to welding school.
First, I had to install the stock Ford Mustang exhaust manifolds so that I could route my new exhaust pipes.  Red RTV to seal them up.
This is the driver's side, which is going to be the hardest routing path.  Note the end of the steering column quite close by.
To get from the exhaust manifolds to the mufflers, I bought a bunch of J tubing and started cutting them up and welding them together to route from the stock exhaust manifolds down around the steering, up over the frame rail, down under the tub in front of the firewall, and then along the outside of the frame rail before dumping out in front of the rear tires, on both sides.  
Yes, they are quite curvy and a little rough in my welding, but the tubes themselves are larger in diameter than the ones that I started with, and rust free.
For mufflers, I went with Cherry Bomb glass packs.  I want the rig to be a bit hot rod.
In order to install and remove the tubes as needed, I had to go with heavy duty band clamps, which I think will work out.  I'm not terribly concerned if there are tiny leaks in the exhaust system since the engine won't work with a catalytic converter (it's a '63) and it'd be hard for the exhaust to harm me in a wide open Willys CJ.  Here you can see the passenger side routing as the tubing goes through part of the firewall support bracket.
Driver's side routing underneath and behind the steering column and linkage.

Looks good, doesn't it.
I needed to paint the tips and I had the gold left over from the valve covers, and I like the look.  Also, note the mounting bracket.


Wednesday, July 30, 2014

Front suspension upgrades and Steering Column

Started with the rear suspension.


Made some new shackle plates.  I'll keep them for now, but I'd like to upgraded to TeraFlex Revolver shackles, which are wicked cool.  The project came with these stamped ones, but they were too thin (less than an 1/8" thick) and the holes were wobbled out of round.  Rather than buying new ones, I just bought some 1/8" thick mild steel strips and made my own.  In hindsight, not worth the effort, but I was trying to save some cash.
Marked them out.
Clamped together.  While they aren't all exactly the same length, the holes will be equidistant.
I rounded the edges and drilled the holes on my drill press, then primed them.
Black enamel.
On.


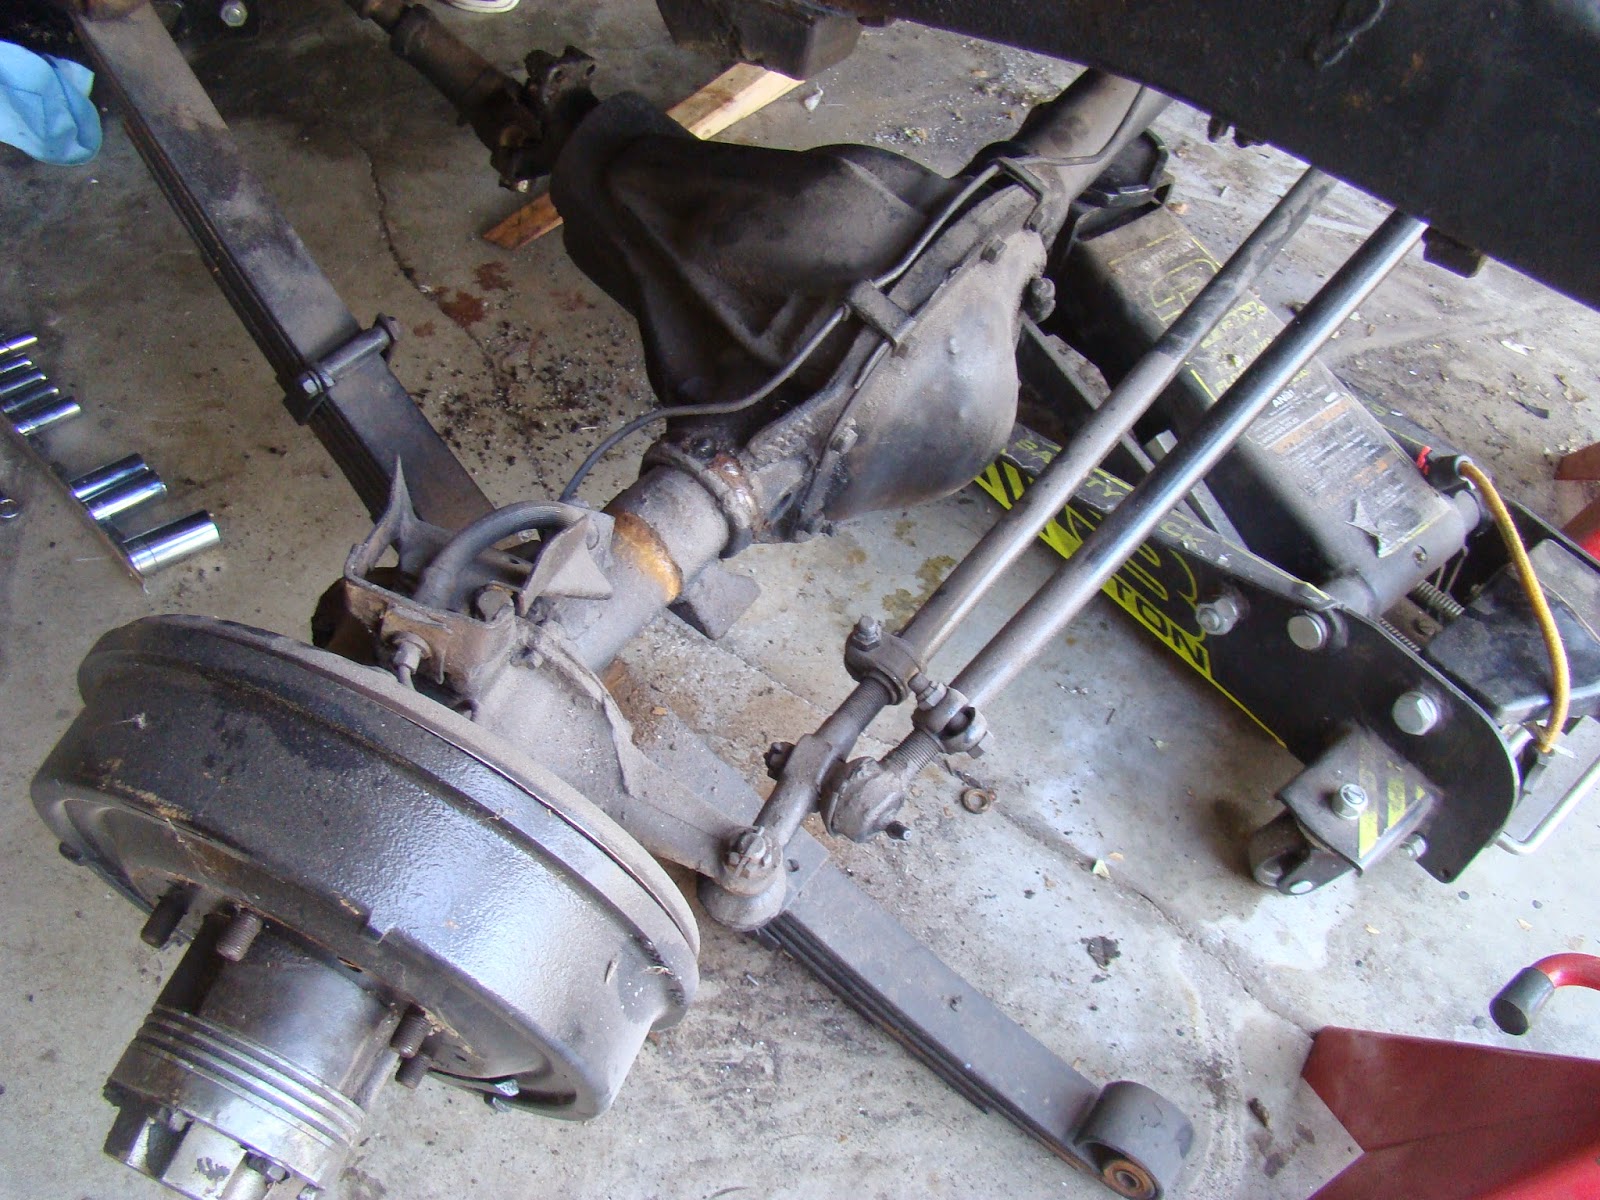
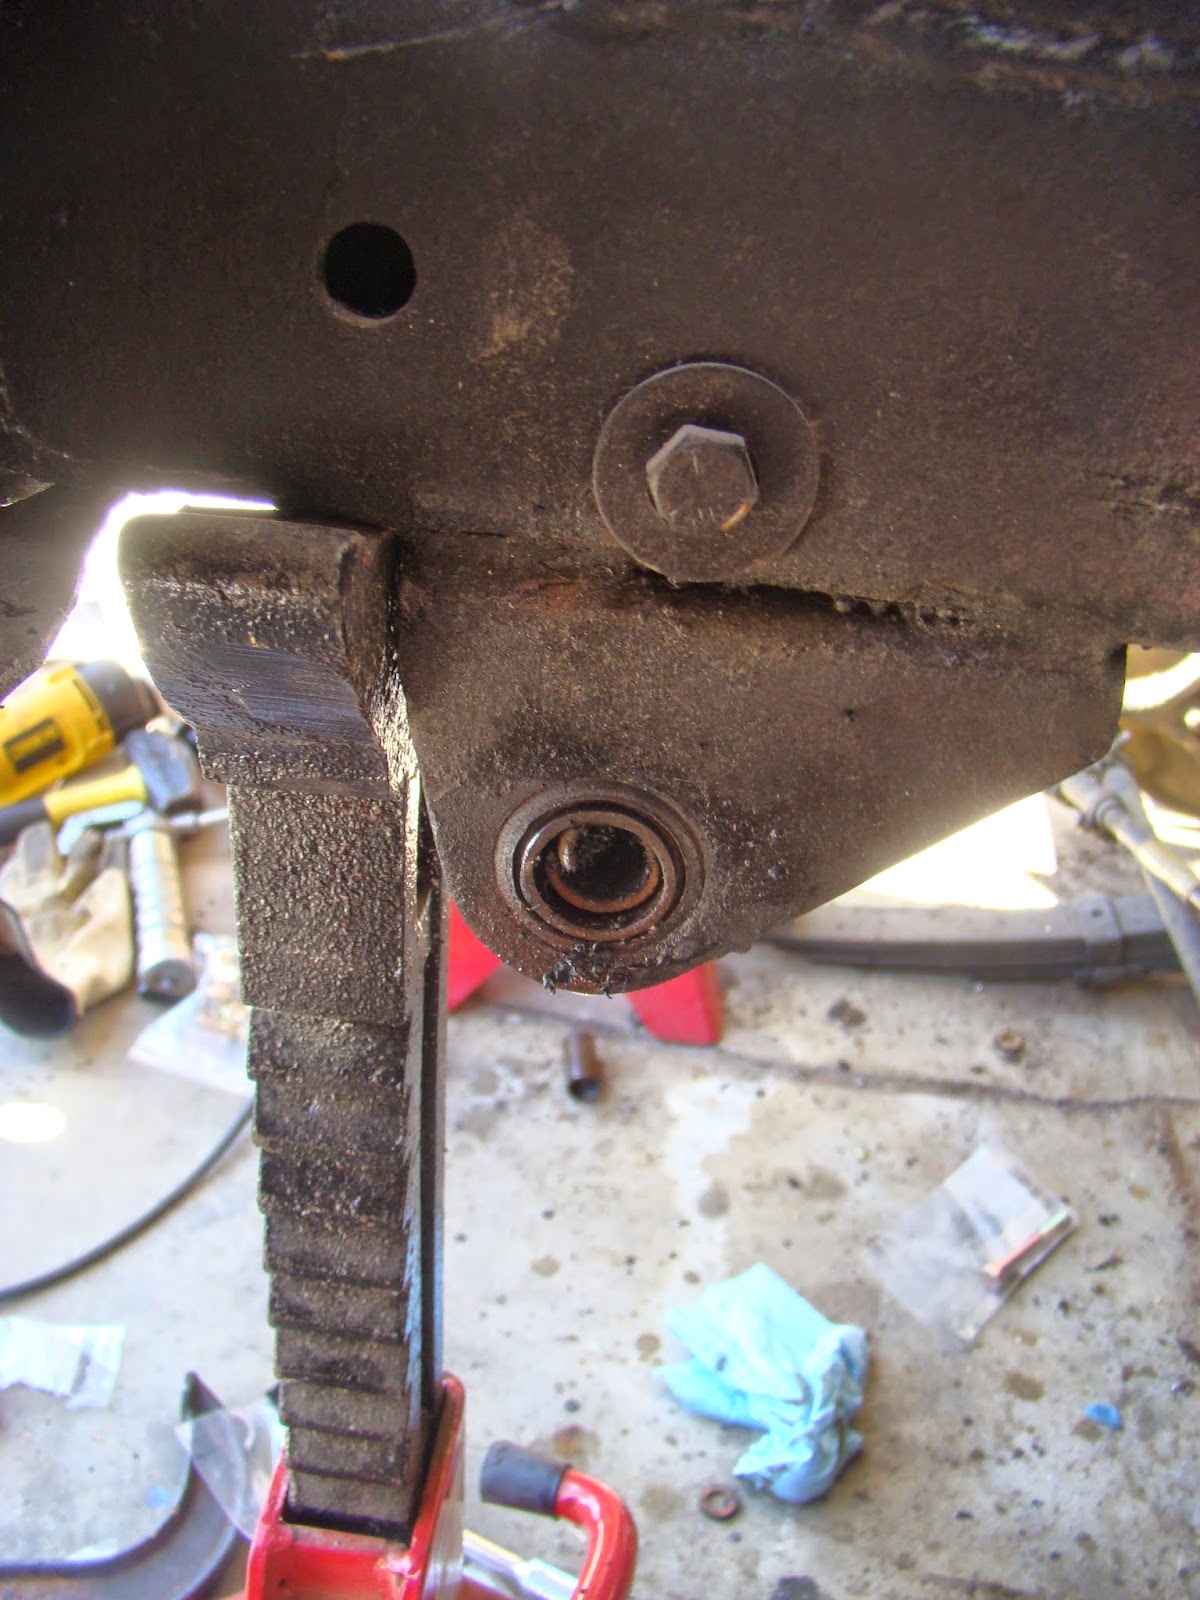
Moving on to the front suspension, which is more complicated.  Tires off.  He's a whiz with the air gun.
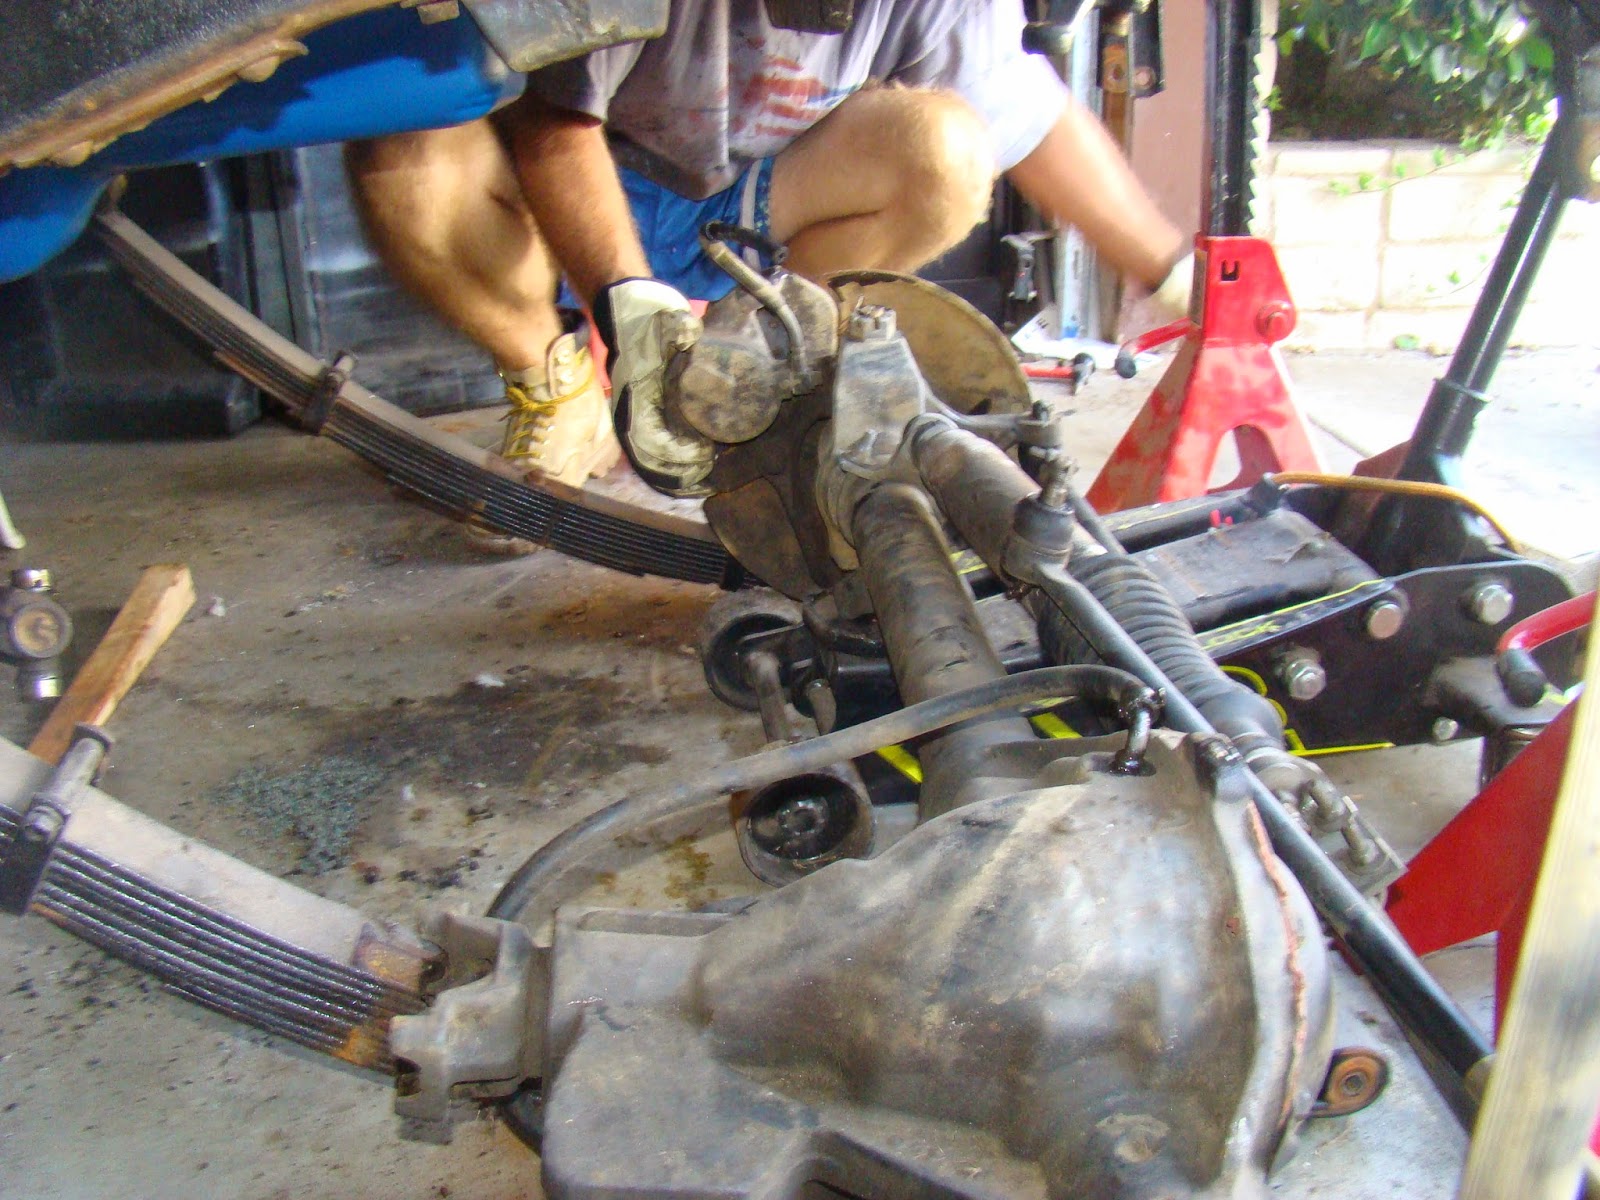
Pulling the Dana 25.  I'm pushing its limits with 31" tires, and I'm not impressed with drum brakes up front.  So I've been looking on Craigslist for a Dana 30, and I finally found a narrow track CJ7 front axle with 3.54's.  It came with an AMC 20, which I'll be selling on, along with the Dana 25.
Out.
These original springs don't have any lift, and they have about ten leaves, which will make them stiffer than I want.
But for now, they stay.  Rancho 2.5" springs are on their way.
I'll be replacing the steering stabilizer, but the brackets are still good.
My wife.  I can't even describe how supportive she is of me and my project.  She knows it's for my mental health, and she doesn't sweat the monthly money drain at all.
The discs.  No real damage on the discs, which is great.  I'll just give them a good cleaning.

The bushings are shot.  I needed to pull them out, which required some tools.


Gunky. These greasable bolts are going to be replaced with grade 8 bolts.
The Rancho springs are here.  Color me happy.


The homemade spring plates that came with the project are less than impressive, but I'll keep them on for now.  Once the rest of the rig is road ready, I'll get good ones in place.  In order to make these work, I had to widen and/or elongate the holes, getting awfully close to the plate edge.  The back axle ones are worse (the shock mount is bent).

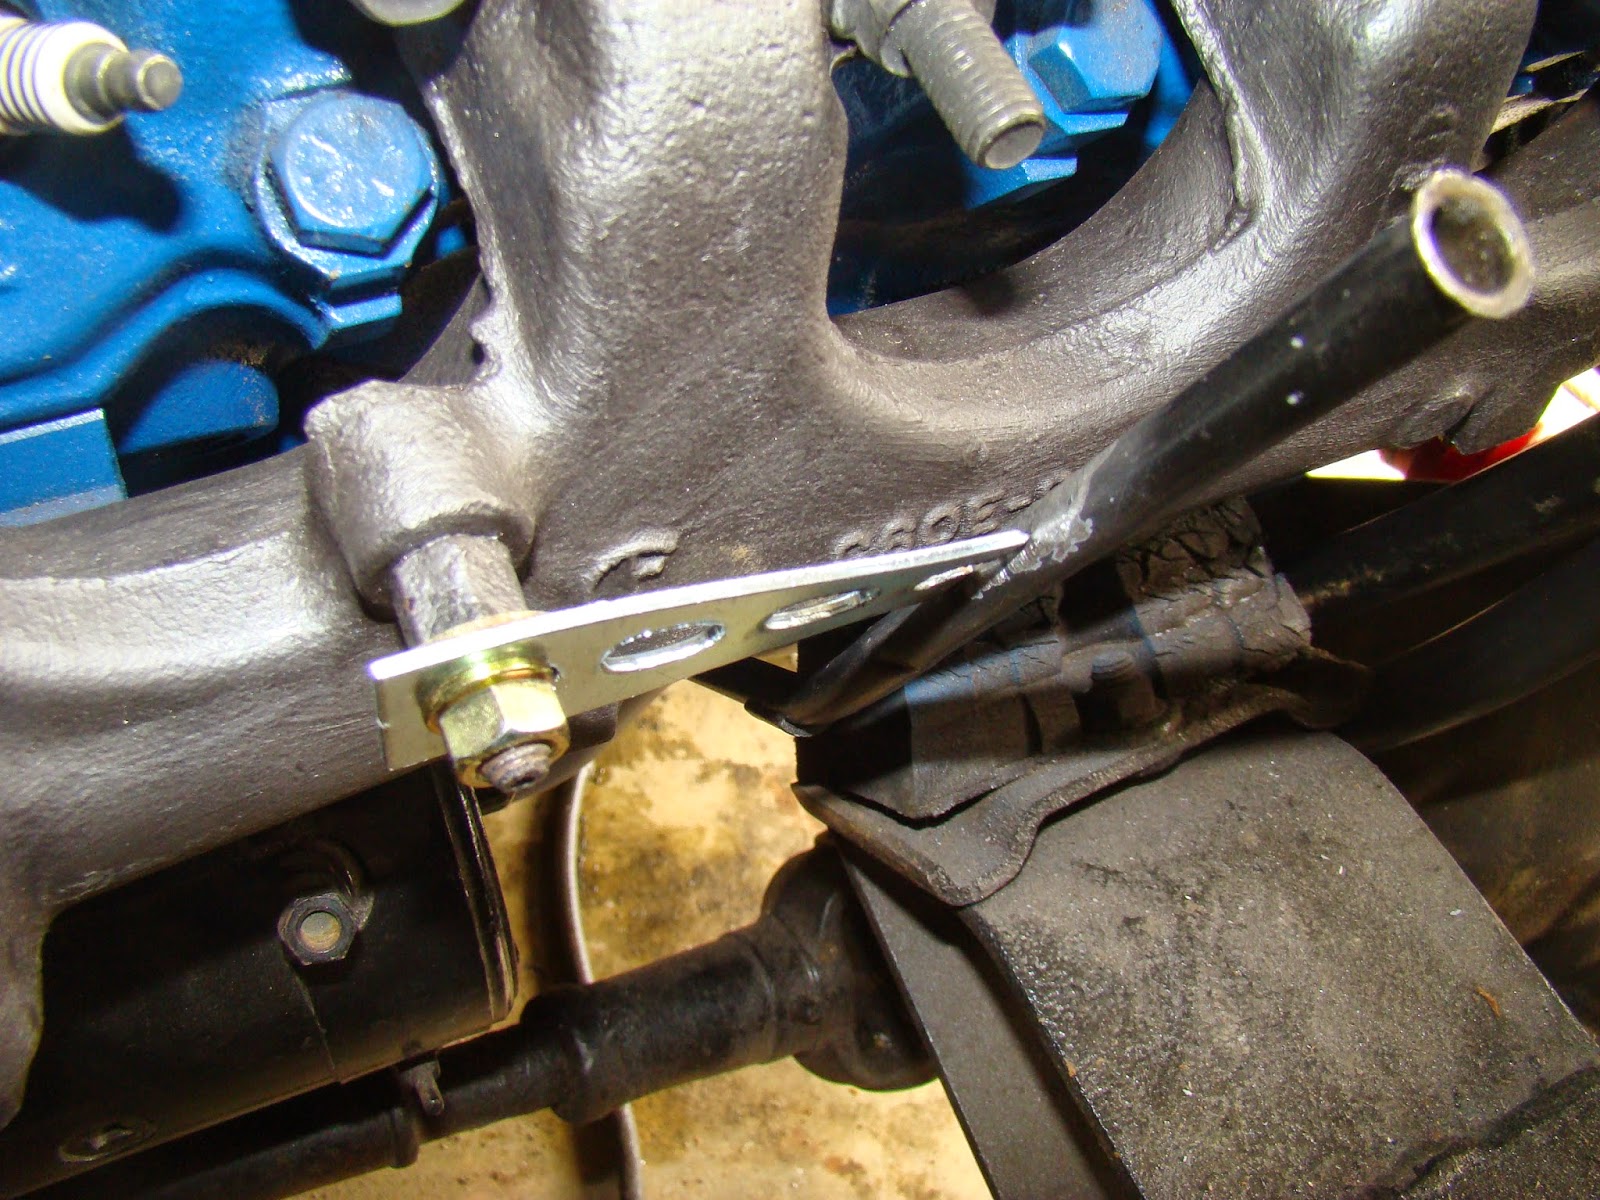
This section of frame rail on the passenger side is boxed, and the bolts are completely rusted in place.  I just cleaned part of the rail and welded the bump stop extension bracket in place.  I'm pleased with the welds, actually.


The driver side was easier to attach.  I just chased the threads of the captured nts and bolted them in place.    Here's a pic of a shot bump stop.


I added a new steering stabilizer shock, using the brackets that came with the Dana 30.

The original Dana 25 was a nice close fit.
Unfortunately, the classic steelie rims I have won't fit over the disc calipers, so I need to add spacers.
Originally, I bought 2" spacers.  They were too much.
The 2" spacer.
So I dropped down to 1.5" spacers.  I kept the 2" spacers for the back since the CJ3A Dana 44 is narrower in stock form than the CJ7 narrow track Dana 30.  The alignment works well.

This sadness is what happens when someone with more practicality than sentimentality cuts up an original steering wheel to mount an Grant monstrosity.

So I got this one off of eBay for $50 bucks shipped.  It's an original with a bit of cracking, which to me is better than a reproduction in perfect shape.  It fits the vibe of the rig.

The steering column is slightly bent with a bearing welded to one end.  It'll have to do.
Cleaned up and primed.
I did some research on steering columns and figured out I could use some of this scrap phenolyic plastic I had to make some centering bushings.
The stages.
 This is the end of a new CJ3A steering shaft with the worm gear cut off.  I slid the splined shaft up inside (perfect fit) and drilled some holes to weld them together.
Welded up and grinded smooth enough for me.
Shaft meets column and bushings.
More parts that came with the rig.  I will massage them to get them to work with the column and steering shaft.
 And the rag joint and universal joints all together.